Gardeners often prefer perennials over annuals because perennials have a long lifespan, rebloom every spring, and do not have to be taken up in winter.
Everyone loves flowers, and with vibrant perennial choices, it is easy to have a perfect flower garden.
Annuals die back every fall and must be replanted. In the long run, perennials are much less expensive because once they are planted, they live for decades.
Perennials are also native plants, meaning they are low maintenance and multiply by reseeding themselves every fall when they reach their dormant cycle.

This article will discuss our five favorite perennials, which will create a stunning spring flower display for years to come!
Ajuga is a beautiful spring blooming perennial.
Ajuga (Ajuga reptans) includes plants known as bugleweed, carpetweed, blue bugle bug seed, carpet bugle carpet bugleweed, and every day. These are also members of the mint family Lamiaceae and are prolific growers that could quickly cover a large area.
Most of them are purple or blue flowers, though they can also be found in white; they are deer-resistant. They thrive in shade areas and add vibrant bronze, green or black leaves to your landscaping.
The best method to grow Ajuga
Ajugas are best planted in the early spring months in rich soil that receive full or partial shade (they thrive in partly shaded regions). The plants should be placed 8-15 inches apart. A little caution is required not to plant ajugas too deep or plant them too close to the ground to stop the crown from becoming rotten.
After planting, mulch your ajuga using an adsorbent layer of bark to stop weeds from taking over the young plants. The gap between the plants will fill up within an entire year or so.
Ajuga is a great choice for filling out a pot with other plants since it fills in the gaps. Use a drainage-friendly container and put the plant in place with good air circulation. Ajuga can form beautiful groups with other perennials, such as coreopsis, campanula, yarrow Geraniums, and primroses.
Ajuga plants are resilient to drought; you could consider companion plants such as thrift, creeping thyme, sedum, or even chicks and hens.
Wild Ginger
Although wild gingers, like Asarum and Hexastylis species, can be found worldwide, most planted to enhance their beauty are indigenous to the woodlands of shade found in Asia and North America. The diversity of cultivars and species available gives gardeners a variety of colors and leaf patterns to use in the shade garden.
Wild ginger is a ground cover for a shaded landscape or woodland. Plant the individual plants 12-24 inches apart, eventually creating an area of the carpet. The majority of species are tolerant of moderate shade. They can also be planted under partial shade, but the leaves can burn in hot summers. They like well-drained and moist soil; however, they can tolerate clay.
Wild ginger can be divided by cutting large rhizomes that grow close to the soil's surface. Spring is the ideal time to split; however, the robust plants can be divided at other times throughout the year, but this will slow down the development.
The plants can also be propagated from seeds that mature during the middle of summer. Plant the seeds on the outside of pots, just barely covering them, then put the pots into the ground and leave them outside during winter.
Daffodils
Daffodils are perfect flowers to plant in landscapes and natural spaces. They spread and get bigger every year, and the plant blooms with an intense and vibrant color. Daffodils are often referred to as Narcissus.
Nothing can say "spring is coming" like the Narcissus and daffodils. Then they appeared everywhere just a few days ago; there was only soft grass and other winter debris. Their stunning yellow petals, long cups, and star-shaped flowers are sure to please anyone who comes across them.
How to plant Daffodils in your yard?
The soil should be 60 degrees F or less cold. In the North, it will happen in October or September, while in the South in November or October. Find a place in your yard that has good drainage and receives complete shade or full sun.
The bulbs should be planted approximately 3 to 6" deep and 4-5" apart, lying on the soil with pointed ends. Then, water them thoroughly and wait until Spring arrives. Once the daffodils are blooming, don't cut the leaves off. Please keep them on until they're yellow and dry, then take them off.
The first step is to prepare your garden by mixing an appropriate quantity of compost or other organic material.
Sow seeds and gently press them into the soil.
Ensure the soil is moist until the seeds germinate and seedlings grow into plants.
The key to success is patience. Seedlings planted are expected to bloom in the second or third year.
Siberian Iris
The vast Iris Genus that is the Siberian Iris category (Iris sibirica) gets somewhat less interest than the more famous and well-known bearded irises; however, it does have some advantages over this group.
Like all irises, the Siberian iris has sword-like, strappy foliage; however, its leaves are quite beautiful even after the flowers have gone, providing an appearance similar to that of ornamental grass. Siberian Irises are warmer than other bearded iris species and thrive in gardens that extend as much as USDA Cold Hardiness Zone 3.
Siberian Iris is relatively simple to cultivate in an entire sun area and in any soil that is damp but not too wet. It is crucial to maintain a steady moisture level in Spring and the early Summer months; however, the plants can tolerate dry conditions later in summer. Siberian Iris requires less care than the bearded iris. However, periodic division every three to four years is vital to stop the plant's clusters from becoming overgrown and woody, which leads to smaller blooms.
Perennials have a long lifespan of over a decade.
5 Favorite Blooming Perennials of Spring
A perennial bed designed for spring display serves as a colorful centerpiece for any garden while delivering new growth each year. Your choice of specific plant varieties depends on personal preference and local conditions; however, the core steps and design principles remain unchanged. This guide explains preparing the bed and choosing planting patterns to organize perennials for an abundant and harmonious spring display without concentrating on specific flower species.
1. Planning and Site Selection
A successful spring perennial bed begins with selecting an appropriate site. Select a location with abundant sunlight throughout the day because spring-blooming perennials grow best under full sun or partial shade conditions. When choosing where to plant your spring perennials, pick locations where you spend time, like entrances or walkways, to enjoy their display. Also, assess how water drains on the site. Since most perennials cannot withstand standing water, you should consider better drainage solutions or choose species that can handle moist environments when dealing with heavy soil.
2. Soil Preparation
Healthy soil is critical for robust growth. Before planting, prepare the area by loosening the top few inches of soil with either a garden fork or a tiller. Take out weeds and remove all discovered old roots and debris during soil preparation. Enrich the soil by adding organic material like well-aged compost, enhancing nutrient density and promoting better drainage. Most spring perennials need well-draining, fertile soil to prosper, even though some prefer slightly acidic soil while others need neutral conditions. Perform a quick soil test whenever possible to determine your soil's pH level and nutrient content. Compost provides a beneficial balance to garden beds even when you choose not to perform a soil test.
3. Designing for Continuity and Interest
Creating visual interest over time in spring perennial beds requires effective layering techniques. The sequential color display in a spring garden is achievable by planting spring-flowering perennials according to their regular blooming schedule. Start with bulbs and tuber varieties that bloom at the beginning of spring, then plants that bloom in mid-spring, then finish with those that reach their peak in late spring or carry on into early summer. Planting flowers that bloom at different times creates continuous visual interest while avoiding empty patches when certain plants finish blooming.
Foliage's form and texture are vital in filling out a garden bed during non-blooming periods and should not be ignored. Use broad leaves resembling straps, feathery textures, and well-defined clumps to create structural interest in your garden design. Be aware that certain plants stay green after blooming, whereas others enter dormancy shortly afterward. Organize plantings to maintain continuous coverage throughout seasonal changes and prevent bare areas in the garden bed.
4. Planting Patterns for a Balanced Look
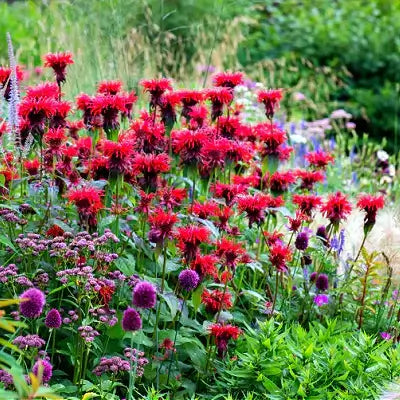
Drifts and Swathes: A traditional perennial bed design method involves planting plants in clusters or rows. Arrange identical plants in softly curved groups or uniform bands. This method creates broad color strokes that stand out dramatically from afar. Plant early-blooming perennials at the front edge of your bed and follow them with mid-spring varieties behind them before adding late-blooming plants toward the back section. The consistent color sweeps bring unity to the design.
Repeating Clusters: A pattern-based planting strategy involves distributing identical plant clusters across the garden bed regularly. This method is effective for gardeners seeking a visual flow that guides the viewer across the entire garden space. By repeating specific leaf shapes or flower forms in different groupings at various intervals throughout your composition, you create visual "echoes" that bind the entire arrangement together.
Matrix Planting: Matrix planting allows gardeners to achieve a tapestry effect through naturalistic planting styles. You combine numerous plant types in a deliberate design that appears random. The garden design involves a foundational layer of low-growing perennials, which you can mix with taller upright plant groupings. Matrix planting is an excellent choice for a botanical design that looks natural with multiple layers of diverse plant species.
Vertical Layers: Assess the height of each perennial plant to establish visual layers of background, midground, and foreground. Taller plants structure the back of the bed, while mid-height plants occupy the center area. Compact varieties border the front or edges. The terraced setup allows full visibility for all plants while ensuring they receive sufficient sunlight. The arrangement prevents front overcrowding, which creates a neat appearance.
5. Maintenance and Ongoing Care
Once the planting is complete, water thoroughly to help develop strong root systems. Perennials require less maintenance than annuals, but they benefit from mulch that retains moisture and prevents weed growth while keeping roots cool. If your plants produce multiple flowering cycles, remove dead flowers when they start to bloom to promote continuous blooming. Trim away exhausted foliage at season change and top-dress with compost to restore soil nutrients.
6. Adapting and Evolving
Successful spring perennial beds usually change naturally as time goes by. You might observe that certain plants naturally propagate themselves or drop seeds, while others require periodic division every few years to avoid becoming overcrowded. Monitor the performance of your perennial bed and make necessary adjustments by rearranging existing plants or adding new ones to fill empty spaces and adjust plant height levels. The flexibility of a perennial bed is one of its most significant advantages: This living tapestry welcomes continuous enhancement through observation of plant performance based on garden appearance and local climate and soil conditions.
A well-planned springtime perennial bed built with proper soil preparation and a thoughtful layout brings lasting joy through the years. The goal of maintaining an interesting garden during spring requires proper synchronization of bloom periods with foliage textures and plant height differences. This stable base allows you to establish a charming presentation that does not depend on particular plants and lets you experience its evolution into a permanent focal point of your landscape.


