Bradford Pear Tree | Information | TN Nursery

The Bradford Pear Tree: Beauty and Controversy

The Bradford Pear tree (Pyrus calleryana 'Bradford') has long been a staple in urban and suburban landscapes due to its striking appearance and adaptability. However, despite its initial popularity, the Bradford Pear has also faced controversies and environmental challenges that have sparked discussions about its suitability as a landscaping choice.

The Bradford Pear tree, a deciduous ornamental tree, hailed from China and was introduced to the United States in the early 20th century. Initially brought to America for its aesthetic qualities, such as its showy white flowers in spring and vibrant red and orange foliage in autumn, the tree was embraced by landscapers and homeowners alike. Its dense, symmetrical canopy and fast growth rate made it appealing for creating a quick visual impact in urban and suburban settings.

Physical Characteristics

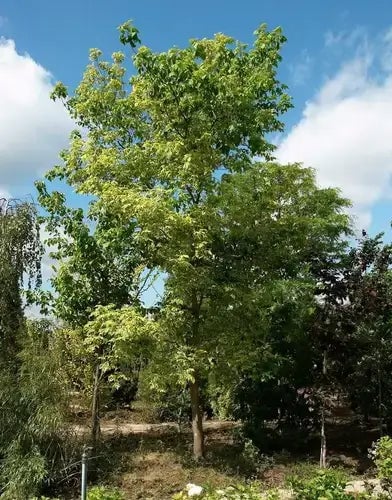
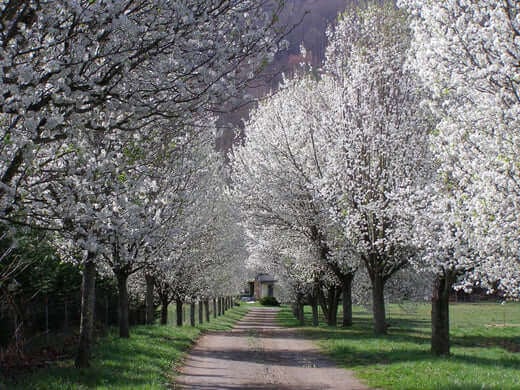
The Bradford Pear tree typically grows to 30 to 50 feet with a spread of around 20 to 30 feet. Its pyramid-shaped canopy and uniform branches make it an eye-catching addition to streets, parks, and gardens. During the spring, the tree becomes a vision of elegance as its blossoms cover the branches in a blanket of white flowers. The fragrant flowers are a source of nectar for pollinators, making them a popular choice for those seeking to support local wildlife.

Controversies:

While the Bradford Pear tree's early popularity was undeniable, it soon became apparent that its seemingly ideal traits came with significant drawbacks and challenges.


  1. Weak Branch Structure: One of the most notable issues with the Bradford Pear is its soft branch structure. The tree's branches grow at tight angles, leading to "V"-shaped crotches prone to splitting during storms or heavy winds. This susceptibility to breakage risks property and people, making the tree less than ideal for urban environments where falling branches can cause damage or injury.
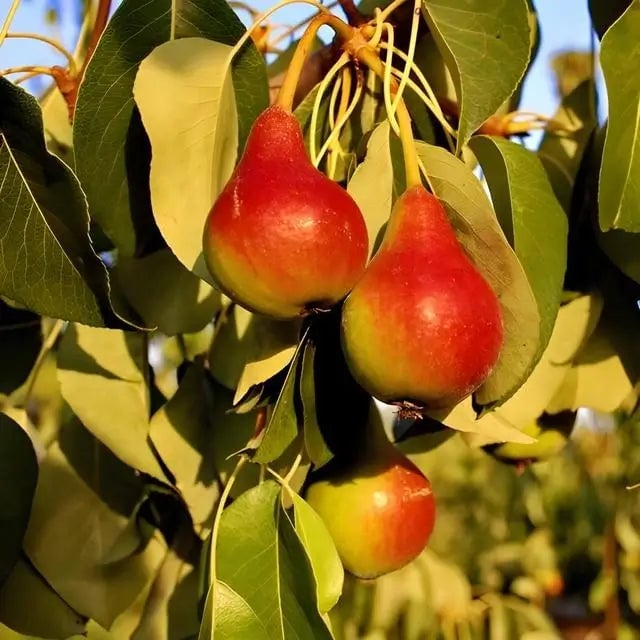
  2. Invasive Tendencies: A more substantial concern regarding the Bradford Pear tree is its invasive nature. As the tree matures, it produces small, hard fruits eaten by birds. These birds spread the seeds far and wide, increasing invasive thickets in natural areas. The offspring of Bradford Pear trees often crossbreed with other varieties of Callery pear, creating hybrid trees that can take over ecosystems and crowd out native vegetation. This invasiveness has led to the labeling the Bradford Pear as an invasive species in many regions.
  3. Short Lifespan: Despite its rapid growth, the Bradford Pear tree has a relatively short lifespan compared to other tree species. Many trees decline and show weakness or disease after 15 to 25 years. This shorter lifespan reduces the long-term benefits of planting the tree and contributes to its overall unsuitability for urban forestry.


Alternatives and Solutions

Given the issues associated with the Bradford Pear tree, many experts and organizations advocate for alternative tree species that offer similar aesthetic qualities without negative impacts. Some suitable alternatives include:

  1. Native Trees: Choosing native trees well-suited to the local climate and ecosystem can help promote biodiversity and support native wildlife. Native trees are more likely to thrive without becoming invasive nuisances.
  2. More robust Cultivars: Some cultivars of Callery pear have been bred to have more muscular branch structures, reducing the risk of breakage. While these varieties may address one concern, they might not mitigate the tree's other issues.
  3. Diverse Landscaping: Diversifying the types of trees planted in a landscape can help prevent the spread of diseases or pests and reduce the impact of a single species' decline. This approach also enhances the overall health and resilience of the ecosystem.


Planting the Bradford Pear Tree: Steps and Guidelines

Planting a Bradford Pear tree (Pyrus calleryana 'Bradford') requires careful reflection and proper technique to ensure its successful establishment and growth. While the tree's beauty and rapid growth rate can be appealing, addressing potential challenges such as weak branch structure and invasive tendencies is crucial. Here's a step-by-step guide on how to plant a Bradford Pear tree effectively:

Site Selection:

Choosing the right location is paramount for the long-term health of the tree. Consider the following factors when selecting a planting site:

  • Sunlight: Bradford Pear trees thrive in full sunlight. Select a site that receives at least 6 hours of direct sunlight daily for optimal growth and flower production.
  • Soil Conditions: The tree prefers well-draining soil that is slightly acidic to neutral. Conduct a soil test to assess pH and soil composition. Amending the soil with organic matter can improve drainage and nutrient availability.
  • Space: Ensure the chosen site provides enough room for the mature tree's size and canopy spread. Avoid planting too close to buildings, utility lines, or other structures.

Tree Selection:

Choose a healthy tree from a reputable nursery or garden center. Look for a tree with a straight central leader (main trunk) and well-spaced branches. Avoid trees with signs of disease or damage.

Timing:

The best time to plant a Bradford Pear tree is in the fall or, instead, spring when the weather is more relaxed, and there's ample time to establish its root system before facing the stress of summer heat or winter cold.

Digging the Hole:

Dig a planting hole two to three times the width of the tree's root ball and slightly shallower than its height. This will provide enough room for the roots to spread out and establish.

Soil Preparation:

Remove the tree from its container and gently loosen the roots if they circle the root ball. Place the tree in the hole and backfill it with the original soil mixed with compost or other organic matter. This mixture enhances soil structure and promotes healthy root growth.

Planting Depth:

Ensure the tree is planted at the same depth it was previously growing, with the top of the root ball level and surrounding soil. Planting too deep or too shallow can hinder root establishment.

Mulching:

Apply a layer of  mulch around the tree's base, such as wood chips or bark. The mulch helps retain moisture, suppress weeds, and regulate soil temperature. Be sure to leave a gap between the mulch and the tree trunk to prevent moisture accumulation and potential rot.

Watering:

Immediately after planting, water the tree thoroughly to settle the soil and eliminate air pockets around the roots. Consistent watering is essential for root development during the tree's first year. Keep the soil evenly moist but not soggy.

Pruning:

Pruning should be minimal during the first year to allow the tree to focus on root growth. Remove broken or damaged branches and maintain a single central leader to encourage a strong structure.

Staking:

While Bradford Pear trees typically don't require staking, if the tree is in a windy location or has a history of weak branches, consider risking it for the first year to provide stability.

Maintenance:

Regular maintenance, including watering, mulching, and periodic pruning, is crucial for the tree's ongoing health and development. Monitor for signs of disease, pest infestations, or structural issues and address them promptly


Conclusion:

The Bradford Pear tree's journey from a celebrated ornamental to a controversial and problematic species highlights the importance of considering the long-term ecological impacts of landscaping choices. While it's stunning appearance and fast growth once made it a popular choice, its weak branches, invasiveness, and short lifespan have led to its reconsideration of modern landscaping practices. As we strive to create sustainable and resilient environments, we must seek alternatives that offer both beauty and ecological benefits without compromising the delicate balance of our ecosystems.

Best Sellers

Pear Fruit Tree - TN Nursery

Pear Fruit Tree 3-4'

Pear Fruit Tree - Pyrus Pear fruit trees (Pyrus communis) are easy to plant and maintain and are ideal for amateur gardeners who desire to have some extra produce on hand. These are suited to the full sun for growth and produce development. After they’re planted, they need little maintenance. Frequent watering during dry times and occasional pruning to shape it and provide more excellent airflow are all you need to keep them healthy and productive. The Stunning Blooms Of The Pear Fruit Tree  They bloom in early to mid-spring with fluffy white flowers that create a pretty display and attract pollinators. Later in the year, green foliage blooms throughout the canopy, providing shade and beauty all summer. Toward the end of the summer and early fall, it produces produce. The leaves turn golden-yellow in autumn and then fall off when it is dormant. Longevity of Fruiting Pear Trees They are medium-sized with an upright, rounded canopy and are typically 20 to 30 feet tall and wide by the time they are mature. Because of their sleek appearance, they are an excellent addition to orchards, yards, or even for themselves. When managed well, these evergreens can survive decades, giving gardeners year-round yields of yumminess. TN Nursery Offers Quality Plants TN Nursery provides healthy, deeply-rooted pear fruit trees ready to grow in your garden. Known for their pretty flowers, green foliage, and productive produce, these are a low-maintenance addition that can transform any outdoor space into something both beautiful and valuable. Ours is top-quality.

Regular price From $38.98
Regular price Sale price From $38.98
Unit price  per 

Best Sellers

Plum Fruit Tree - TN Nursery

Plum Fruit Tree

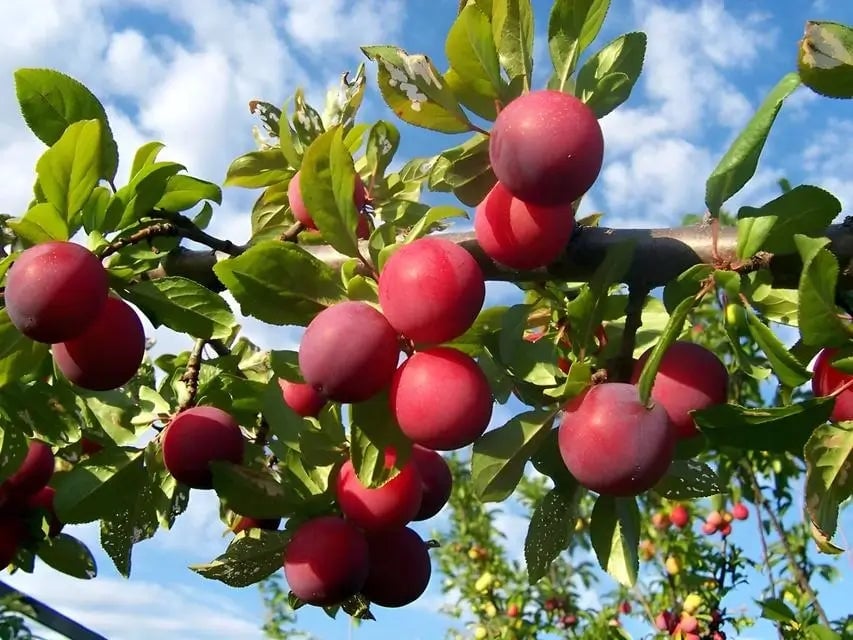
Plum Fruit Tree: Prunus Domestica Plum fruit trees produce smooth-skinned, juicy produce with various colors, including red, purple, and yellow, typically surrounded by oval-shaped leaves. They are versatile and attractive types with numerous benefits when incorporated into landscaping designs. With its ornamental features and adaptability, it can enhance the visual appeal of outdoor spaces. Also known as Prunus domestica, and they will give you plenty of them after the first three to six years. When one of these deciduous plants is first planted, they'll appear shrub-like.  The Flowers Of The Plum Fruit Tree  Although most people plant one of these to receive free produce, there is much more for you to enjoy. For instance, they flower during the springtime. Each cluster of primarily white flowers also contains light green and little yellow balls that attract pollinators. Interestingly, the flowers will appear before the foliage arrives. As clusters, several clumps of flowers will be mashed together to create visual appeal. Shortly after the flowers make their appearance, you'll begin to notice immature leaves. These leaves grow in little clusters, and their bright, vivid green coloring will transition into a slightly softer green as they age. Each leaf starts larger at the base before tapering into almost a point. They have ridged edgings, along with some natural variations in tone. The Fruits Of Plum Fruit Trees Once the flower clusters die away, they'll be replaced by tons of produce. These are spherical or oval in shape, and they grow up to three inches wide. It goes through a massive color change to help designate whether it's ripe. When it's green-toned, it is not ripe yet. In this state, they can almost blend in with their surrounding leaves. Eventually, though, they'll change into a purple or reddish color. Not only will their new coloring make them pop, but it's also an indicator of ripeness. Different Varieties Of Plum Fruit Trees There are two major categories of them: Santa Rosa and Methley. Within these categories are found subcategories, and the specific type you plant will determine their exact coloring. Regardless of which type you plant, you can look forward to tons of produce. They will pay for themselves over time and are quite attractive to boot! Do they grow in America Yes, they are grown throughout America, and there are different types for different zones. They are grown for commerce and local consumption in yard and garden plantings, primarily in California and Michigan.  Where do they grow best?  They bear best in slightly alkaline soil which should be well drained with good exposure to sunlight. These prefer areas with moderately cold winters and relatively higher temperatures during summer, a condition prevailing in temperate climates.  What is special about them?  They are particularly valued for the use of both produce and ornamental importance when in blossom during spring.  Where are they grown in the USA?  Commercial types are mostly grown in the US, especially in California, because of its mild climate. The other big states are Michigan, Oregon and Washington. What is the best climate for them? Outside of these parameters, plum fruit trees prefer moderate winters and warm summers to get the right climate for growth. These depend on the chilling hours to set produce, hence suitable for regions with relatively moderate cold winters.

Regular price From $34.99
Regular price Sale price From $34.99
Unit price  per 
Apple Fruit Trees - TN Nursery

Apple Fruit Trees 3-4'

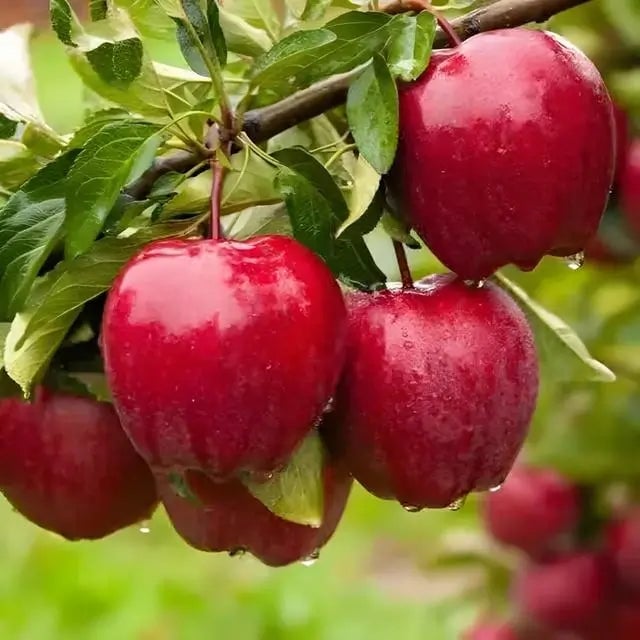
Apple Fruit Trees: Malus Domestica Growing your own apple fruit trees can be a rewarding and delicious endeavor. Whether you're aiming for sweets right off the branch or planning to bake warm pies, there's something special about nurturing these trees from planting to harvest. But before you dive in, it's essential to understand that not all varieties thrive everywhere. Factors like local climate, soil conditions, and even sun exposure play crucial roles in how well your trees will grow and produce fruit. With a little effort and care, you'll soon be enjoying your very own homegrown ones! When growing them, it is important to choose the right variety suited to your climate, ensure proper soil conditions, and provide adequate sunlight and water. Regular pruning and pest management will also promote healthy growth and improve fruit production. Choosing the Right Apple Tree Varieties Selecting the right variety goes beyond simply finding one that survives in your area; you also want to ensure it produces ones that you love. It's like choosing a friend based on what activities you enjoy together- the better the match, the more enjoyable the experience will be when harvest time arrives. When selecting your variety, think about your intended use for them as well. For, crispy varieties are usually preferred, while softer varieties may be better suited for baking or cider-making. Consider your taste buds-do you lean towards sweet or tart? Each variety offers its unique flavor profile, which can drastically affect your enjoyment of homegrown ones. Popular Apple Fruit Trees Varieties for Different Climates Cold Climates: For those residing in northern areas, Honeycrisp stands out with its crisp texture and sweet-tart balance. Northern Spy is renowned for its rich flavors, making it ideal for pies and sauces, while McIntosh delivers a softer fruit perfect for baking. Warm Climates: Moving southward, types like Gala deliver sweetness that's lovely fresh off the tree, while Fuji maintains its crispness even after storage. If you want something zesty with a kick, Granny Smith has you covered-and it holds up beautifully in baking. However, understanding climate suitability and regional preferences isn't enough; your personal taste truly shapes your orchard. Ideal Planting Conditions Proper planting conditions for your apple trees can make all the difference. The ideal environment combines suitable soil, sufficient sunlight, and adequate spacing. Let's explore each component to give you a solid foundation for nurturing your orchard. Soil Requirements To start with, they thrive in well-drained soil. The goal is to create the best possible soil environment where your trees can establish strong roots. Once your soil checks out as suitable for planting, let's discuss sunlight needs. Sunlight Needs Sunlight is another critical requirement. They need at least six hours of direct sunlight daily. However, the more sun they receive, the better yields and sweeter fruits you'll enjoy when harvest time arrives. Picture this: as the sun dances across your orchard each day, it's providing essential energy that fuels photosynthesis-a process that's vital for producing those succulent ones you look forward to picking. Therefore, choosing a location that maximizes sunlight exposure could lead to an abundant harvest. Now that we've covered soil and sunlight, it's essential to understand how spacing affects growth. Spacing Criteria Finally, space makes a significant difference in the health of yours. Ideally, plant them about 15-18 feet apart. This distance allows each tree enough room to grow without competing for moisture and nutrients. Think of this as giving your trees personal space; they will grow healthier and more robust when they aren't overcrowded. By avoiding too dense an arrangement, you're promoting good airflow and preventing issues related to disease growth, which tends to flourish in crowded environments. Understanding these key elements lays the groundwork for effectively establishing your orchard, paving the way for a comprehensive approach to successful planting techniques. Step-by-Step Planting Guide The first step to a successful planting is proper site preparation. Begin by clraning the area good; this means removing weeds, rocks, and any debris that could interfere with growth. Imagine your new tree as a guest at a dinner party-it deserves a clean space to flourish! Once the area is clear, it's time to dig a hole that's double the width of the root ball. This spacious opening will allow roots to grow freely. However, be cautious not to dig deeper than the height of the root ball-hosting your tree too deep can suffocate its roots. Now that your hole is ready, it's time for the exciting part-planting! Carefully lift yours from its container, being gentle to avoid damaging the roots as you do so. As you place it into the prepared hole, pay special attention to the graft union-the small bulge on the trunk above the roots. This graft should sit above the soil line to ensure healthy growth. Once positioned correctly, begin filling the hole with the removed soil around the roots. Ensure that it's firm but not compacted; you want to offer support without restricting root expansion. Think of this as tucking a child in for bed-firmly but gently. With your tree nestled in its new home, watering becomes paramount. Immediately after planting, water your newly placed ones generously. This process helps eliminate air pockets in the soil and encourages proper root establishment. Aim for moist soil, taking care not to saturate it-too much water can create a swampy environment detrimental to roots. Adding mulch around the base is also essential; it helps retain moisture and suppress weeds but remember to keep mulch away from the trunk itself-this prevents rot and pest issues. Following this step-by-step planting guide will set yours on a path toward thriving health and eventual fruitful harvests. Each action taken now contributes significantly to your tree's long-term success in producing luscious fruit year after year. As we shift our focus now, understanding how to nurture and shape your tree will play a crucial role in maximizing its growth potential. Pruning and Maintenance Tips Proper pruning and maintenance are essential for healthy, productive ones. It's a rewarding endeavor that begins long before you see the first blossoms or fruits. Understanding when to prune your trees sets the foundation for successful growth. When to Prune Aim to prune yours in late winter or early spring, ideally right before the new growth begins. At this point, your tree will still be dormant, which means it can efficiently recover from any cuts made without stressing it. The tree is also less susceptible to disease during this time. Imagine pruning as giving your trees a good, needed haircut just before heading into their active growing season. How to Prune Start by removing any dead or diseased branches-like preventing an illness from spreading within a community, this helps keep the remaining parts of the tree healthy. Next, focus on thinning out crowded sections, allowing more light and air to circulate. This not only improves the tree's appearance but also significantly benefits its health and productivity. Aim for an open-center shape as you prune; envision a well-structured umbrella that allows sunlight and rain to penetrate deeply into the foliage. Beyond effective pruning, regular maintenance is vital to nurturing strong trees. Fertilization Fertilization is another critical aspect of maintenance. In early spring, applying a balanced fertilizer provides essential nutrients that encourage growth. However, it's important to stop fertilizing after July. Late-season growth might leave tender new shoots vulnerable to winter damage after the frost hits. Think of it like preparing for a big storm; you wouldn't want to be caught outside with flimsy clothing just as winter arrives. Instead, aim for a solid layer of protection by allowing your trees to harden off before colder temperatures take hold. Additionally, ensure yours receive adequate water. They thrive with consistent and deep watering-ideally once a week-especially during dry spells. You can check dirt moisture by digging down a few inches; if it's dry at that depth, it's time for a drink! Keeping both hydration and nutrition levels balanced allows your trees to grow vigorously while producing abundant fruit. With these practices in place, you'll set your trees up for strong growth and productivity as they mature. Now let's explore crucial steps to protect them from common threats and ensure their health continues. Harvesting and Storage Techniques Knowing when to pull them from your trees directly impacts the taste and quality of the fruit. Harvest generally occurs in late summer. A useful trick is carefully lifting; if it separates easily from the branch with a gentle tug, it's ready. This simple test ensures that you're getting the most flavorful and ripe fruit. When to Harvest The right timing really matters-if harvested too early, you might encounter sour ones, while waiting too long can lead to mealy or overripe fruit. It's not uncommon for home gardeners to mark their calendars based on previous years' harvest dates, adjusting as needed based on yearly weather variations. Regularly checking them as they near maturity will make this decision easier each season. Harvesting Techniques Once it's clear that yours are ripe, it's time to pick them with care. Use a gentle twisting motion when removing apples from the tree; this minimizes bruising and helps maintain the integrity of both the fruit and tree branches. Supporting them with one hand while twisting gently with the other can prevent tearing stems, a common mistake that can weaken your tree's productivity in future seasons. Proper harvesting practices not only enhance the quality of your crop this year but also preserve tree health for fruitful seasons ahead. Storage Methods Storage Method Duration Notes Refrigerator 1-2 months Keeps fresh longer; humidity control is necessary. Cool Basement 2-4 weeks Ideal for short-term storage; darker conditions are best. Canning 1 year Excellent for preserving large quantities. Proper storage ensures you can enjoy yours for months, making all that hard work worthwhile.  With these techniques in mind, you'll not only optimize your apple harvest but also enjoy your delicious fruits long after picking them. Happy gardening!

Regular price From $38.99
Regular price Sale price From $38.99
Unit price  per